Text in Opkle Editor stays live; it never turns into an image. You can edit the words and change the font anytime, and it stays crisp until you export. This page covers three ways to add text, how to style it, and how to put a table in your design.
Three kinds of text
Click the text slot in the toolbar to open three tools. Text (T) makes a single line when you click and a text box when you drag. A Text box wraps lines within the size you dragged, and text that overflows is clipped inside the box. Short text like titles works best as a single line, and longer text like descriptions as a text box. Path text writes along a path or shape you click, so you can make logo text that runs around a circle.
Press Esc to finish editing. To edit existing text again, select it and press Enter, or double-click it.
Character and paragraph
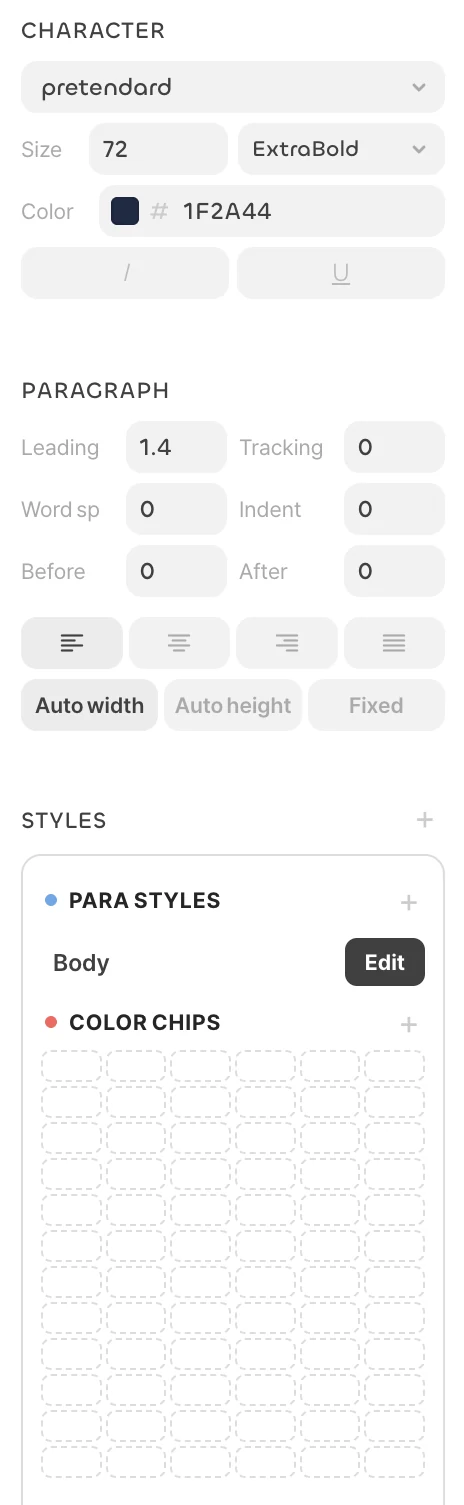
Select text and use the Character section on the right to set the font, size, weight and color, and toggle italic and underline. The shortcuts ⌘B · ⌘I · ⌘U are bold, italic and underline.
Below it, the Paragraph section sets line height, letter spacing, word spacing, indent and space above and below paragraphs, plus left, center, right or justified alignment. This is also where you choose how a text box sizes itself: Auto width grows sideways with the text, Auto height keeps the width and grows downward, and Fixed keeps the size you set. Text boxes whose content changes often are safest with auto height so nothing gets clipped. Save text looks you use often in Styles › Para styles to apply them to other text in one go.
More with right-click
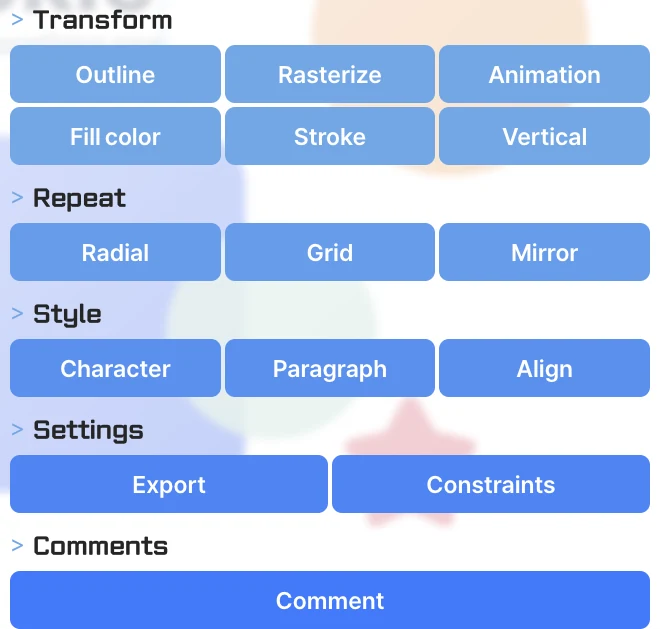
Right-click text and choose Vertical to set it vertically, or Outline to turn it into shapes (paths). Outlined text keeps its look even where the font isn't installed, but it can no longer be edited as text, so it's best to duplicate the original first. Character, paragraph and align in the Style group open the same settings from the menu.
Your fonts and tables
Drag your font files (ttf · otf) onto the canvas or add them with Insert → Font file at the bottom right, and you can pick them right away in the Character section's font list.
Put information that goes with graphics, such as price lists or schedules, in a table. Choose New table in the toolbar and click the artboard to create a table, and click the table again to edit its contents in the table editor. Tables move and resize like any other element, so they fit naturally into your design.