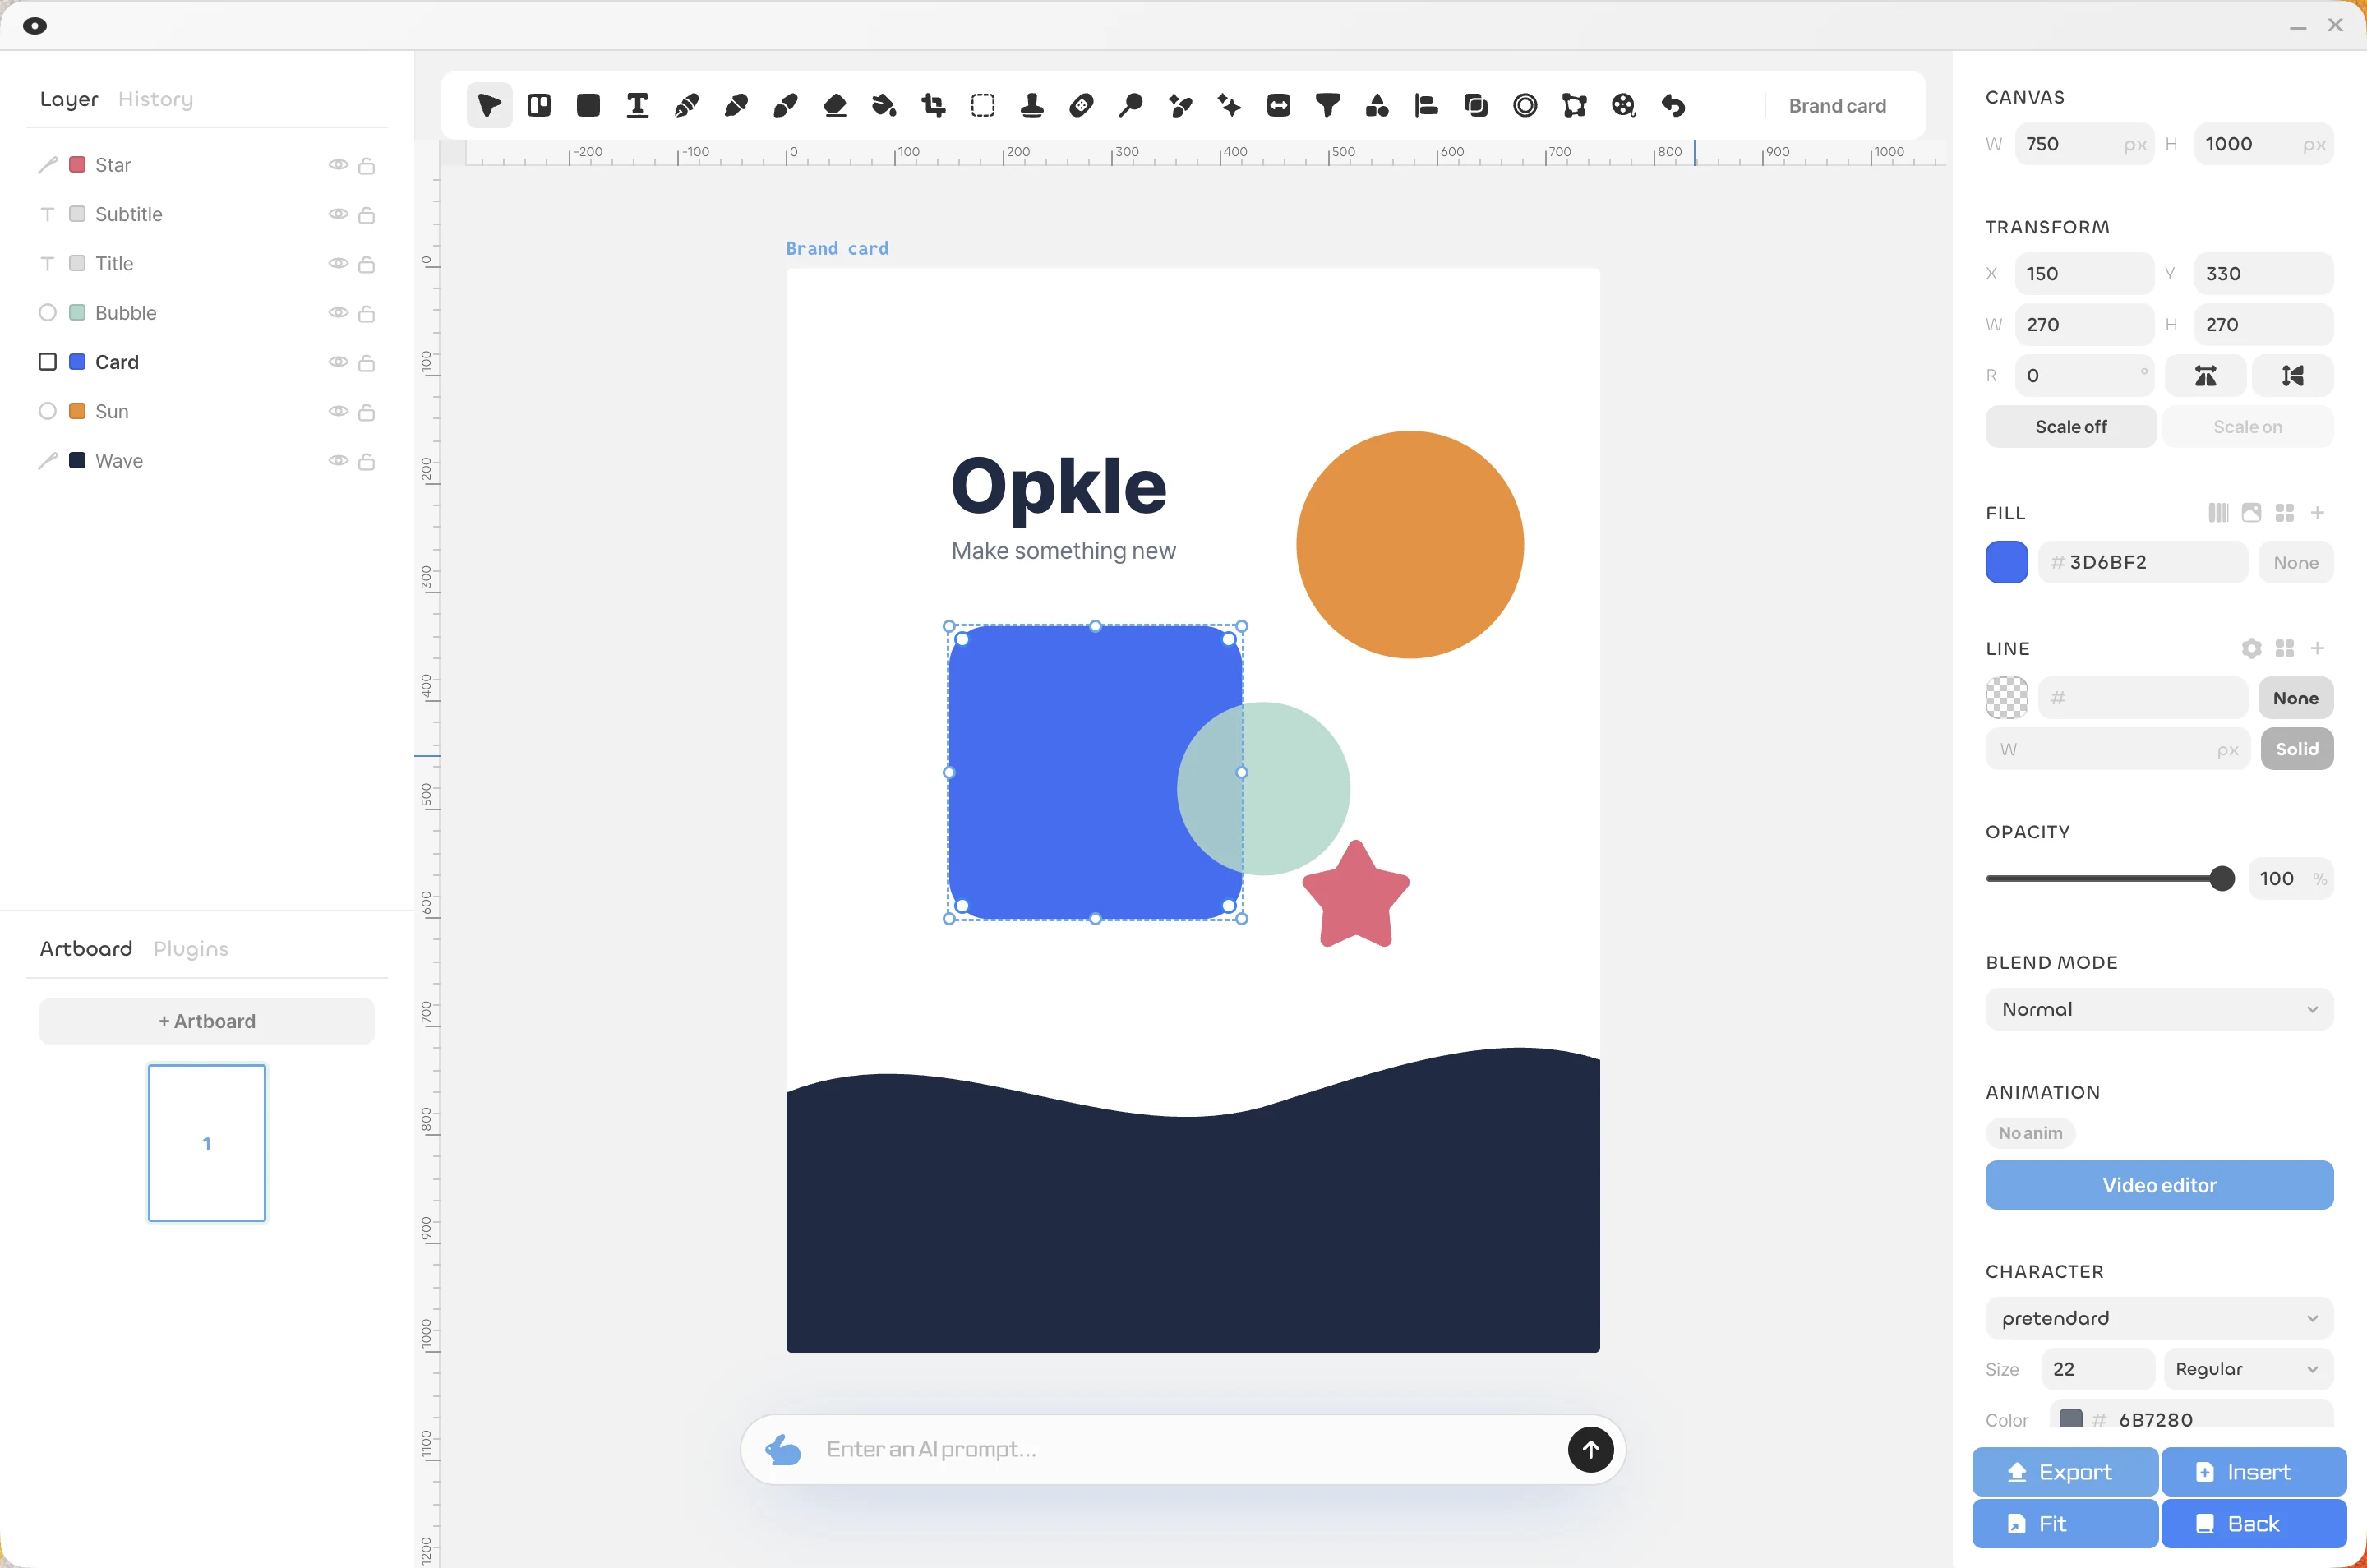
The editor screen has five main areas. At first, just remember the flow: «pick on the left, grab a tool at the top, change values on the right». That covers most work. This page goes through what each area does and the spots that are easy to mix up.
The toolbar at the top
Drawing and editing tools live here. Similar tools share a slot: click the slot and a row of icons drops down so you can pick another tool from the same group. The shape slot holds ten shapes from rectangle to star and donut, and the brush slot holds the brush, pencil and smudge. The last tool you picked becomes the slot's icon, so the tools you use most end up one click away. Hover an icon to see its name, shortcut and a short tip.
From the left: Selection (V), artboard and frame (A · F), shapes (R · O), text (T), new table and path (P), followed by photo tools such as the picker, brush, eraser, crop, pixel select, stamp and healing. At the right end are the AI group, filters, group, align, pathfinder, warp, video editor and undo.
The left panel
At the top left are two tabs: Layer · History. Layer lists the shapes, text and images on the current artboard in drawing order, and the eye and lock on each row hide or lock them. Right-click an empty spot to create an empty pixel layer or an adjustment layer, or to open the image generator.
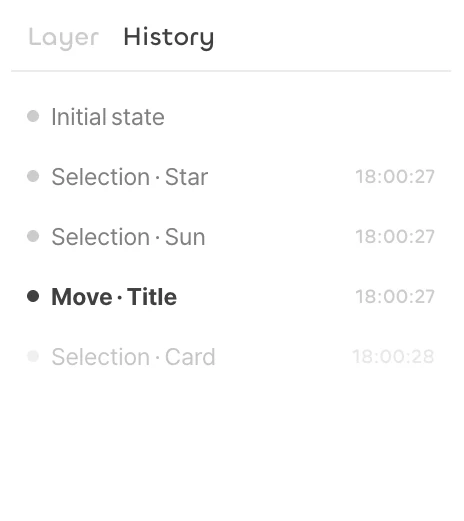
History stacks up everything you've done with a timestamp, and undone steps are dimmed. It helps when you want to see what changed and when. The bottom left holds the Artboard list: add artboards with + Artboard, and click one in the list to move the view to it. The Plugins tab next to it holds your plugins (see «Using plugins»).
The inspector on the right
This is where you change values for what you've selected. The sections shown depend on your selection. By default you'll see canvas and constraints, transform (position and size), fill and stroke, opacity and mode, component assets, animation, character and paragraph, styles, filters and export.
Select a frame and clip, auto layout and layout grid sections are added. Select a photo and ML adjust, photo adjustments such as levels, curves and white balance, and vector tracing continue further down. It looks like a lot, but only what your selection needs appears, so skim from the top and you'll get used to it quickly.
Bottom-right buttons and the AI prompt bar
At the bottom right, Export saves images, PDFs and video, and Insert brings in fonts, images, video and animation files. Fit shows the artboard snugly on screen, which helps when you get lost zooming, and Back returns to the project screen.
At the bottom center is the AI prompt bar. Write what you want to do and Opkle AI operates the editor for you. When the bar is folded into the rabbit button at the bottom right, for example after using the video editor, click the button to open it again.
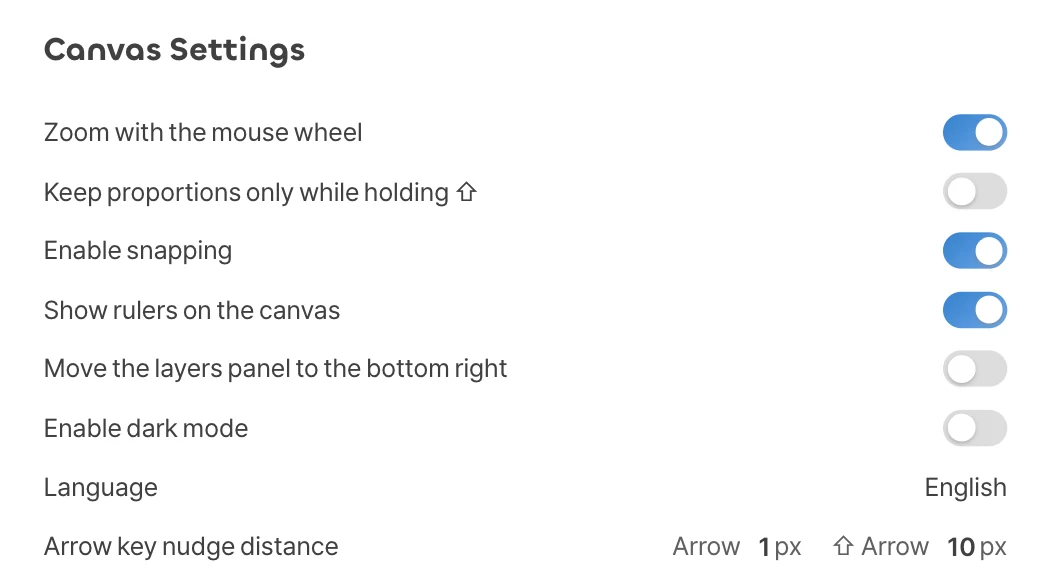
The logo at the top left: profile and canvas settings
Click the logo at the top left to open your profile. At the top are the Community · Docs · Logout buttons and your Credit Balance, and below them Canvas Settings lets you tune your workspace. Choose whether the mouse wheel zooms, whether to keep proportions only while holding ⇧, whether snapping and rulers are on, whether the layers panel moves to the bottom right, dark mode, the screen language, and how far one arrow-key press moves things. Depending on whether you use a trackpad or a mouse, just changing the wheel setting can make the editor feel very different.